- All
- Product Name
- Product Keyword
- Product Model
- Product Summary
- Product Description
- Multi Field Search
Views: 0 Author: Site Editor Publish Time: 2025-09-04 Origin: Site


You use a vertical machining center by following simple steps. First, you set up the machine. Next, you program it. Always think about safety. Watch what you do at every step. This keeps you safe. It also helps you make accurate parts. Many companies pick vertical machining centers because they are flexible. These machines sell much more than horizontal machining centers:
Type of Machining Center | Units Sold in 2017 |
|---|---|
Vertical Machining Centers (VMC) | 7,800 |
Horizontal Machining Centers (HMC) | 1,600 |
Stay careful, because injuries can happen more than you think:
Safety Incident Type | Frequency/Statistics |
|---|---|
Amputations | About 18,000 incidents each year |
Lacerations and abrasions | These are part of the 18,000 injuries each year |
Injury incidents per 100 workers | A little over 3 incidents for every 100 workers in 2019 |
Go slow and follow each step. You will feel more sure as you use these strong machines.
Always put safety first by wearing the right PPE and keeping your area tidy. This helps stop accidents and keeps people from getting hurt.
Set up your vertical machining center step by step. Good setup makes sure the machine works right and lowers mistakes.
Do a dry run before you start real machining. This test helps you find problems in the program and makes sure things work well.
Check and take care of your machine parts often, like coolant levels and tool shape. This helps your machine work well and last longer.
Write down your steps and any changes during jobs. Good records help make future work better and fix problems faster.
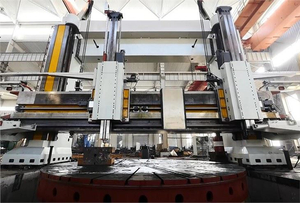
You may ask why a vertical machining center is so important today. It is like the main tool in many factories. A vertical machining center is a strong machine. It uses computer controls to cut and shape metal or plastic parts. You put your workpiece on the table. The spindle moves up and down to cut from the top. This is how vertical machining centers work.
You use a cnc control system to run the machine. The machine moves in three main ways:
The X-axis goes left and right.
The Y-axis moves front and back.
The Z-axis moves up and down.
This setup lets you control every cut very well. That is why a cnc vertical machining center can do jobs that need very close measurements. Many industries use these machines because they work for many jobs and help make more parts faster.
Here are some common ways people use vertical machining centers:
Industry | Applications |
|---|---|
Aerospace | High accuracy and precision machining |
Manufacturing | Mass production of various components |
Medical | Production of precise medical devices |
Automotive | Manufacturing of automotive parts |
Tool and Die | Creation of molds and tooling |
Military/Defense | Production of components for defense systems |
Job Shops | Custom machining for various client needs |
When you look at cnc vertical machining centers, you will see some special features. The spindle stands straight up and down. This lets you cut right into your material from above. This design makes the machine smaller and easier to fit in tight spaces than horizontal machines.
You get helpful automation like automatic tool changers and coolant systems. These save time and keep your parts cool when making many pieces. The cnc control lets you make hard shapes and patterns easily.
Here are some important features to think about:
Feature | Description |
|---|---|
Machining Requirements | Works with many materials and shapes quickly and accurately. |
Technical Parameters | Has spindle speed, travel range, and keeps the machine steady. |
Intelligent and Automated Functions | Uses AI and automation to work better and save money. |
Brand Reputation | Good brands give better help and are more reliable. |
Cost-Effectiveness Analysis | Helps you get the most for your money. |
Future Technological Developments | New machines use AI to be more accurate and work faster. |
You will see more uses for vertical machining centers as technology gets better. With the right machine, you can do almost any job in manufacturing.
When you look at the components of a vertical machining center, you see how each part works together to make the machine powerful and precise. Let’s break down the main parts you’ll use every day.
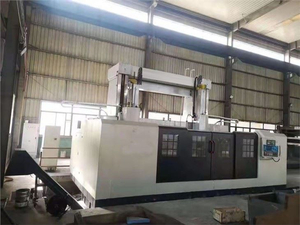
The frame gives the machine its strength. You want a solid frame because it keeps everything steady while you cut. Stability matters a lot. If the frame shakes, your parts will not come out right. The frame and structure support all the other components of a vertical machining center. This is the backbone that holds the spindle, worktable, and other moving parts in place.
The spindle spins your cutting tools at high speeds. It moves up and down, following the working principle of vertical machining centers. You can swap tools fast with automatic tool changers. These save you time and help you work more efficiently. Here’s how tool changers boost your workflow:
You get increased productivity because tool changes happen quickly. This means less waiting and more making.
Automation cuts down on mistakes. You get the same results every time.
You save money and time. The machine does more work with less effort from you.
You control the whole machine from the control panel. It’s like the brain of the operation. Check out what each part does:
Feature | Function |
|---|---|
Display Screen | Shows you what the machine is doing and alerts you to problems. |
Keypad/Keyboard | Lets you enter numbers and codes for your jobs. |
Function Buttons | Gives you quick access to start, stop, or change tools. |
Emergency Stop Button | Stops everything right away if something goes wrong. |
Mode Selector Switch | Lets you pick how you want to run the machine (manual, auto, or jog). |
Program Storage and Retrieval | Saves and loads your CNC programs for easy use. |
Diagnostic Functions | Helps you find and fix problems fast. |
The worktable is where you place your material. You want a table that can handle big and heavy parts. Most tables in a vertical machining center range from 1 to 2 meters, but some go up to 4 meters. The table moves in three directions: left-right (X), front-back (Y), and up-down (Z). This movement gives you the flexibility to make many different parts. A strong table adds to the stability of your setup.
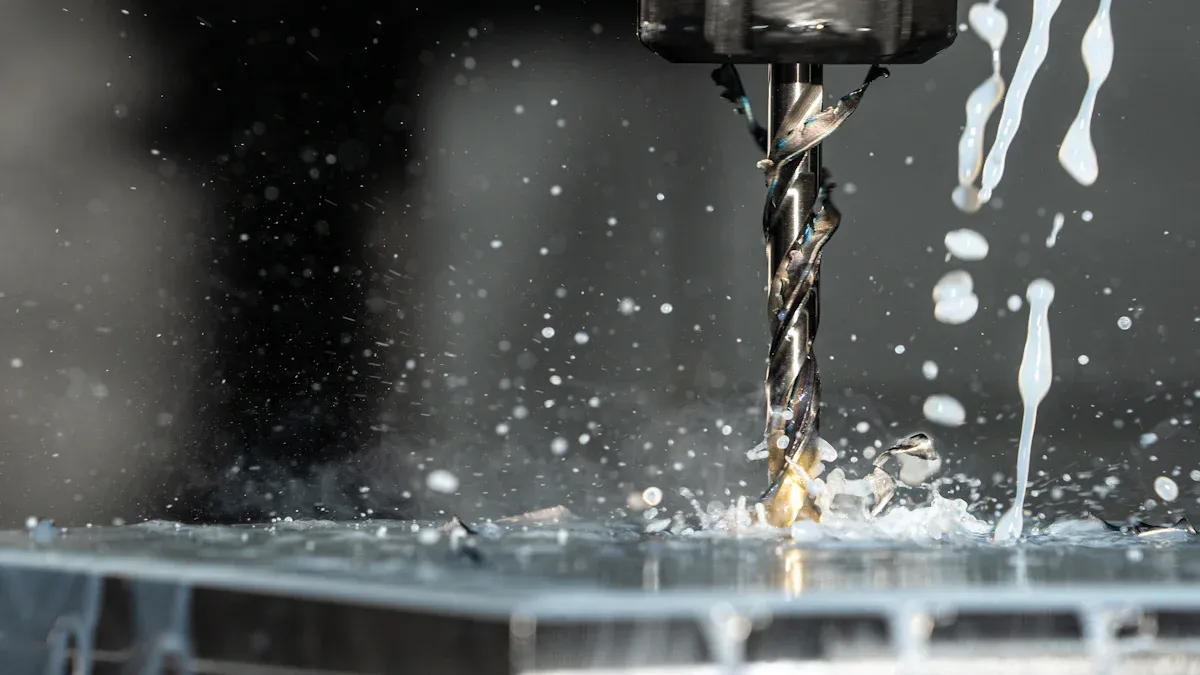
The coolant system keeps things cool while you cut. Cutting metal makes a lot of heat. If things get too hot, your tools wear out faster and your parts lose accuracy. The coolant system removes heat, keeps the temperature steady, and helps your tools last longer. It also helps control chips and keeps your cuts clean. You get better precision and fewer problems with overheating.
Tip: Always check your coolant level before you start. Good coolant flow means better results and longer tool life.
The components of a vertical machining center work together to give you accuracy, speed, and reliability. When you understand each part, you can use your machine with more confidence.
Before you use a vertical machining center, you must get ready. Being prepared helps you avoid mistakes and keeps you safe from harm. Let’s see what you should do before turning on the machine.
You always need to wear the right personal protective equipment (PPE). PPE protects you from flying chips, sharp edges, and hot surfaces. Here is a simple guide:
Type of PPE | Purpose |
|---|---|
Safety Glasses | Keep your eyes safe from chips and bright light. |
Goggles | Give extra safety from splashes. |
Face Shields | Protect your face from sparks and chemicals. |
Disposable Gloves | Keep your hands safe when you clean. |
Chemical-resistant Gloves | Protect your hands from strong chemicals. |
Cut-resistant Gloves | Help stop cuts from sharp tools or parts. |
Heat-resistant Gloves | Keep your hands safe from hot surfaces. |
Puncture-resistant Gloves | Block splinters and sharp things. |
Tip: Tie back long hair, do not wear loose clothes, and take off jewelry. These steps help stop accidents.
Check the machine every time before you use it. This helps you find problems early and keeps the machine working well. Here are the main things to check:
Inspection Step | Description |
|---|---|
General Environment Check | Make sure the area is clean. Look for rust, damage, or bad wires. |
Control Functionality | Test all buttons and screens. They should work and look good. |
Maintenance Logs | Look at records for old problems or repairs. |
Cabin Condition | Check for good lights and working safety features inside. |
Lubrication Check | Make sure oil and grease look clean and fresh. |
Spindle Inspection | Listen for smooth sounds. Watch for wear or strange noises. |
Tool Changer Functionality | Test the tool changer. Look for broken or missing parts. |
Motion System Check | Move the table and head. Watch for smooth moves and no damage. |
Some problems are poor lubrication, spindle trouble, and tool changer issues. If you see a problem, fix it before you start.
A clean and safe workspace helps you work better and faster. Here are some good tips:
Mistake | Solution |
|---|---|
Poor foundation and site preparation | Make sure the floor is strong and flat. |
Inadequate power supply | Check that the machine has enough power. |
Lack of climate control and dust management | Keep the area cool and clean. |
Failing to calibrate the machine properly | Use the manual for calibration and check often. |
Inadequate operator training and safety | Get good training and follow safety rules. |
Stay by the machine while it works. Keep the table clear of tools and mess. These habits help you stay safe and do better work.
Getting your machine ready starts with powering it on the right way. You want to stay safe and avoid mistakes. Here’s a step-by-step guide to help you:
Put on your overalls. Skip the gloves for now. Make sure your workspace is clean.
Read your manual. Check oil levels. Look around to see if anyone is working on the machine.
Connect the main power supply first. After that, turn on the CNC power supply.
Test all control functions. Check the pressure gauges before you start.
If you lose power, turn everything off right away. In an emergency, hit the Stop button.
Tip: Always follow these steps in order. This keeps you and your machine safe.
Before you start any job, you need to check that everything works. Use this table to make sure you don’t miss anything:
Category | Checks |
|---|---|
Cleanliness | Remove debris, secure guards, surface wipe down |
Mechanical Checks | Inspect slide rails, verify tooling, ensure lubrication, clean chip hopper |
Electrical and Safety Checks | Test indicator lights, verify emergency stop functionality, inspect cables |
Hydraulic and Cooling Systems | Check for leaks, monitor fluid levels, ensure chiller units are operational |
Go through each row. If you spot a problem, fix it before you move on. This helps you avoid bigger issues later.
You need to set a reference point before you start cutting. This step tells your machine where “zero” is. When you set the right reference point, your first part comes out just right. If you skip this, your cuts might be off. Always use the right measuring tools to check your setup. Taking time here saves you trouble later and helps your vertical machining center make accurate parts every time.
Picking the right tool for your job makes a big difference. You want to match your tool to the material and the shape of your part. If you use the wrong tool, you might break it or ruin your workpiece. Here are some things you should think about when you choose a tool:
Materials: Some tools work better with certain materials. For example, you need a different tool for aluminum than for steel.
Precision: Think about how exact your part needs to be. Some jobs need tight tolerances, so you need a tool that can handle that.
Part Size and Shape: Make sure your tool fits the size and shape of your part.
You should also look at these points:
Workpiece material and features
Production volume
Machine capacity
Tool material
Tip: Always check your machine’s manual for tool recommendations. This helps you avoid mistakes and keeps your machine running well.
Once you pick your tool, you need to install it in the spindle. Start by cleaning the tool holder and the spindle nose. Dirt or chips can cause problems. Hold the tool straight and push it into the holder. Listen for a click or feel it lock in place. Tighten the tool holder using the right wrench. Never use too much force. If you feel resistance, stop and check for debris.
Here’s a quick checklist for tool installation:
Clean the tool and holder
Insert the tool straight
Lock it in place
Tighten with the correct tool
Offset calibration helps your machine know exactly where the tip of your tool is. If you skip this step, your cuts might be off. Use a tool setter or a gauge block to measure the tool length. Enter the value into the control panel. Double-check your numbers before you start the program.
If you want accurate parts, always calibrate your offsets after every tool change. This step saves you time and money by reducing mistakes.
You want to load your workpiece the right way to keep it safe and get good results. There are several standard methods you can use. Each one has its own strengths. Here’s a quick look:
Method | Description | Pros | Cons |
|---|---|---|---|
Vises | Clamp rectangular parts directly to the table. | Fast, stable, easy to use more than one at a time. | Not great for odd shapes. |
Soft Jaws | Custom jaws that fit your part’s shape. | Very accurate, gentle on parts. | Wear out faster than hard jaws. |
Step Clamps | Hold parts from the top or side using T-slots. | Strong grip, good for big parts. | Takes longer to set up. |
Fixture Plates | Plates with holes for pins and quick swaps. | Super precise, fast to change setups. | None listed. |
Hybrid Methods | Mix clamps and vacuum tables for tricky shapes. | Great for odd parts, better access. | None listed. |
Tip: Always check that your workpiece sits flat and tight before you start. This helps you avoid mistakes and damage.
You need to hold your workpiece steady during machining. The right fixture keeps your part from moving, even at high speeds. Here are some common fixturing options:
T-slot plates work well for large or odd-shaped parts.
Tombstones let you machine many parts at once, perfect for big jobs.
Custom fixtures fit special shapes and keep them secure.
You might also see hydraulic fixtures in busy shops. These use fluid pressure to clamp parts quickly and with the same force every time. Pneumatic fixtures use air for fast setups, which is handy in automated lines. Electric fixtures use motors for precise control, and magnetic fixtures hold steel parts tight without much effort.
Getting your workpiece lined up right is key for accuracy. You have a few ways to do this:
Use a dial indicator or marking plate to check your part’s position.
Draw center lines or marks on your part before you clamp it down.
Use special clamps or fixtures that set the position for you.
Try a test cut and adjust until you get the size you want.
Use an edge finder for tool alignment without leaving marks.
Keep your machine calibrated and check for wear often.
If you take your time with alignment, you’ll get better parts and waste less material. Regular checks help you keep your machine in top shape.
When you use a cnc vertical machining center, you control the machine with a program. This program tells the machine how to move in different directions. You can make the spindle go up and down, move the table left and right, or even cut in circles. This is called multi-axis machining. You use special codes, called G-codes and M-codes, to give these instructions. Each code has a job. Some move the tool fast, some start the spindle, and others turn on the coolant.
Here’s a quick table to help you see what some common codes do:
Code | Description |
|---|---|
G00 | Move at the machine's fastest speed in a straight line to the commanded coordinates. |
G01 | Move at the last commanded feedrate in a straight line to the commanded coordinates. |
G02 | Move in a clockwise arc to the commanded coordinates at the last commanded feedrate. |
G03 | Move in a counterclockwise arc to the commanded coordinates at the last commanded feedrate. |
M00 | Program stop |
M02 | End of program |
M03 | Spindle on clockwise |
M05 | Spindle stop |
M08 | Flood coolant on |
M30 | End of program/return to start |
You use these codes for many jobs, like drilling, tapping, contour milling, and precision milling. A high-precision cnc vertical machining center can follow these codes to make very detailed parts.
You need to load your program into the vertical machining center before you start the machining process. There are a few ways to do this:
Plug in a USB drive with your G-code file. Use the control panel to find and load the program.
If your machine connects to a network, you can send the program from your computer right to the machine.
For older machines, use an RS-232 cable and special software to transfer the file.
Tip: Always double-check that you loaded the right program before you start. This helps you avoid mistakes.
Before you cut any real material, you should run a toolpath simulation. This step shows you how the machine will move. You can spot problems, like the tool hitting the part or moving the wrong way. Simulations help you fix errors before they cause damage. You can also change speeds and feeds to make the job smoother and save your tools.
Toolpath simulation helps you find mistakes and avoid crashes.
You can test different settings to get better results.
You save time and material by checking everything first.
When you use cnc vertical machining centers, toolpath simulation makes your work safer and more accurate. It helps you get the best results from your machining process.
Before you start cutting any material, you should always perform a dry run. This step helps you catch mistakes before they become big problems. Think of it as a practice round for your cnc vertical machining center. You want to make sure everything works just as you planned.
Here’s how you do a dry run:
Load your CNC code into the machine’s memory.
Run the program using the control panel.
Watch the machine as it moves along the programmed paths, but without touching the workpiece.
During this process, you can spot several issues:
You might notice programming errors that could damage the machine.
You can see if the tool paths are correct or if something looks off.
You get a chance to check that all your parameters are set the right way.
Tip: Always stand by the machine and pay close attention during the dry run. If you see anything strange, stop the machine right away. Fixing problems now saves you time and money later.
Once you finish the dry run and everything looks good, you can start the real machining cycle. This is where your vertical machining center shows its power. You load the workpiece, set the tools, and press start. The machine follows your program to cut, drill, or mill the part.
You want to make sure the machine runs smoothly. Listen for any odd noises. Watch for vibrations or sudden stops. If you see chips building up, clear them out. Good chip removal keeps your tools sharp and your parts clean.
A well-set machining cycle gives you consistent accuracy. You can hit tight tolerances and get ultra-high precision on every part. This is how you achieve reduced machining cycle times and boost your shop’s productivity. When you use cnc vertical machining centers, you get long-term reliability and machining accuracy that you can trust.
If you want your machine to last, always follow the right steps. Keep your workspace clean and your tools sharp. This helps you get the best results every time.
You need to keep an eye on the machine while it runs. Monitoring helps you catch problems early and keeps you safe. There are several ways you can do this.
Monitoring Technique | Description |
|---|---|
CNC Machine Production Monitoring | Records different factors during manufacturing to spot errors and improve efficiency. |
Tool Monitoring | Tracks tool position and movement to make sure it matches the material. |
Surface Anomaly Detection | Looks for surface defects while the machine works. |
Real-time Performance Tracking | Uses sensors to give instant feedback on how the machine is doing. |
You can also use video cameras to watch the machining process in real time. This lets you see what’s happening inside the machine without standing too close. It keeps you safe and helps you spot accidents before they happen.
Video monitoring lets you track the process from a distance.
You can see if the machine is working as planned.
You can react quickly if something goes wrong.
Stay alert during every job. Good monitoring helps you keep your parts perfect and your shop safe.
You might run into problems when you use a vertical machining center. Don’t worry—most issues have simple fixes. Here’s a table that shows some of the most common problems, what causes them, and what you can do:
Issue | Possible Causes | Troubleshooting Steps |
|---|---|---|
Tool Breakage | Too much cutting load, tool wear, poor installation | Adjust cutting settings, check tool wear, install tool right |
Poor Surface Finish | Tool issues, wrong settings, machine vibration | Pick the right tool, change settings, fix vibration |
Spindle Overheating | Bad lubrication, heavy load, cooling problems | Check oil, lower load, fix cooling system |
Axis Movement Errors | Worn parts, control issues, bad environment | Replace worn parts, check controls, keep area clean |
Tool Magazine Malfunctions | Jams, control failures, software bugs | Clear jams, check controls, update software |
If you spot a problem, stop the machine and check this table. You can often fix things fast and get back to work.
Sometimes, you need to make small changes to keep your machine running well. If you see rough edges on your part, try slowing down the cutting speed. When you hear odd noises, check for loose bolts or worn parts. If the spindle gets hot, look at the oil and coolant. You might need to add more or fix a leak.
You can also adjust the tool offsets if your cuts are not in the right place. Use the control panel to enter new values. Always double-check your numbers before you start again.
Tip: Write down any changes you make. This helps you remember what worked and what did not.
Accidents can happen, even if you are careful. If something goes wrong, stay calm. Hit the emergency stop button right away. This button shuts down the machine fast. Move away from the machine if you see smoke or sparks.
Call for help if you cannot fix the problem. Never try to repair electrical parts by yourself. Always follow your shop’s safety rules. Keep a fire extinguisher and first aid kit nearby.
Safety first! You can always fix a part, but you cannot replace your health.
You finished your job, so now it’s time to shut down your vertical machining center the right way. This step keeps your machine safe and ready for the next use. Here’s a simple shutdown checklist:
Stop the spindle and wait for it to come to a full stop.
Return the table and spindle to their home positions.
Turn off the coolant system.
Remove any tools from the spindle.
Power down the CNC control panel.
Switch off the main power supply.
Tip: Always follow the shutdown steps in order. This helps you avoid damage and keeps your machine in top shape.
A clean machine works better and lasts longer. You should always clean up after every job. Here’s what you can do:
Use a brush or vacuum to remove chips from the worktable and inside the machine.
Wipe down the surfaces with a clean, dry cloth.
Check for any leftover coolant or oil and clean it up.
Empty the chip tray or hopper if it’s full.
Make sure the area around the machine stays tidy.
Cleaning Task | How Often |
|---|---|
Remove chips | After each job |
Wipe surfaces | Daily |
Empty chip tray | As needed |
Check coolant spills | Every shift |
Don’t use compressed air to blow chips near sensitive parts. This can push dirt into places you don’t want it.
You need to keep good records after every job. This helps you track machine use and spot problems early. Here’s what you should write down:
Job number and date
Tools used and any changes made
Machine settings and offsets
Any issues or errors you noticed
Maintenance tasks you performed
You can use a logbook or a digital form. Good documentation makes your next job easier and helps everyone in the shop stay on the same page.
Keeping records might seem boring, but it saves you time and trouble later.
You want to get the most out of your vertical machining center. Start with a plan for every job. Double-check your setup before you press start. Keep your tools sharp and clean. A sharp tool gives you better parts and saves you time. Use the right tool for each material. If you use the wrong one, you might break it or ruin your part.
Here are some best practices to follow:
Check your machine’s calibration often.
Keep your workspace clean and organized.
Review your CNC program before running it.
Record any changes you make during a job.
Ask for help if you feel unsure.
Tip: A user-friendly operation makes your work smoother and helps you avoid mistakes.
Safety always comes first. You should never skip safety steps, even if you feel rushed. Wear your safety glasses and tie back long hair. Remove jewelry before you start. Stay near the machine while it runs. If you see something strange, hit the emergency stop right away.
Here’s a quick safety checklist:
Safety Step | Why It Matters |
|---|---|
Wear PPE | Protects eyes and hands |
Keep area clear | Prevents trips and falls |
Use guards | Stops chips from flying out |
Check emergency stop | Shuts down machine fast |
Note: You can always fix a part, but you cannot fix a lost finger.
You can always get better at using cnc vertical machining centers. Try to learn something new every week. Watch how others work and ask questions. Keep a log of what works and what does not. If you make a mistake, write it down and learn from it.
Join online forums or groups for machinists.
Take short courses or watch training videos.
Share your tips with coworkers.
Stay updated on new features and technology.
Remember, every expert started as a beginner. Keep learning, and you will master your machine.
You now know how to operate a vertical machining center from start to finish. Always put safety first and double-check your setup before you begin. Keep learning new tips and watch for updates in machining. If you want to go further, look for online courses or ask your shop for extra training. You can master these skills with practice and curiosity!
You should check the coolant level before every job. Low coolant can cause overheating and tool wear. If you see the level drop during a job, top it off right away.
Stop the machine right away. Listen for grinding or knocking. Check for loose parts or worn tools. If you cannot find the problem, ask a supervisor or technician for help.
You should not use the same tool for every material. Harder metals need stronger tools. Soft materials can dull a tool quickly. Always match your tool to the material for best results.
A dry run is a test run without cutting material. You watch the machine move through the program. This helps you catch mistakes before they cause damage or waste.