- All
- Product Name
- Product Keyword
- Product Model
- Product Summary
- Product Description
- Multi Field Search
Views: 0 Author: Site Editor Publish Time: 2026-08-10 Origin: Site


I still remember the first bad installation I witnessed. It was 2014, a CK6163 horizontal lathe shipped to a small workshop in northern Vietnam. The customer was eager — they'd already lined up three jobs waiting for the machine. So they unpacked it, plugged it into a standard outlet on the wrong voltage tap, skipped the foundation prep, and turned it on. The spindle seized within two hours.
That $3,800 repair bill could have been avoided with a 30-minute checklist. Since then, we've supervised 500+ installations across Southeast Asia, the Middle East, and South America. We now send every customer a pre-installation guide before the machine leaves our factory. This article is the expanded version of that guide — the same 8-point checklist our engineers use on-site.
Here's something most buyers don't think about until it's too late: a $80,000 CNC lathe on a bad foundation will machine worse than a $25,000 machine installed correctly. We've seen it happen. A customer in Indonesia bought two identical CK6180 lathes — one for their main factory (properly installed) and one for a satellite workshop (rushed installation in a weekend). Six months later, the satellite workshop machine was holding ±0.03mm while the main factory machine held ±0.008mm. Same model. Same materials. Different installation.
The point is simple: how you install your CNC lathe determines what it can actually do. A machine that's perfectly calibrated in our factory can lose half its accuracy if the foundation shifts, the power is dirty, or the leveling is off by even a fraction. Here are the 8 checks that prevent those problems.
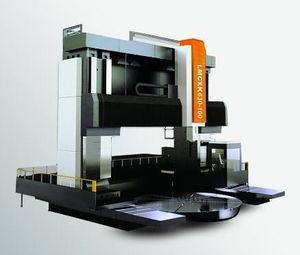
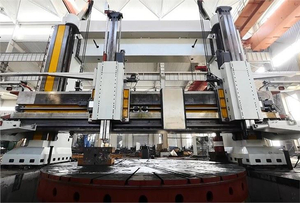
Let me be blunt: about 40% of our customers try to skip proper foundation work. They figure the machine just needs to sit on a flat floor. For small horizontal lathes like the CK6140 or CK6150, that's sometimes fine — a 200mm-thick reinforced concrete pad can work if the existing floor is solid and level. But for anything above 1.5 meters swing diameter, or any vertical turning center, you need a proper foundation.
What does "proper" mean? For our CK5 series vertical lathes, we specify a foundation depth of 500–800mm below frost line, with a 100mm gravel drainage layer underneath. The concrete grade must be C25 or higher, and the pad should extend at least 200mm beyond the machine footprint on all sides. Curing time is 14–21 days minimum. I know you want the machine running yesterday, but concrete doesn't care about your production schedule.
One customer in Thailand ignored this and placed their CK5-1600 vertical lathe on a ground-level slab without a pit. Three months of monsoon season later, the floor shifted 2mm under the left front foot. The spindle was out of alignment by 0.04mm. We flew an engineer out there for a $2,200 realignment — the foundation work would have cost under $500.
Check #1: Foundation dimensions match the machine's installation drawing (we send this with every order).
Check #2: Concrete has cured for the full specified period.
Check #3: No cracks, hollow spots, or moisture seepage before placing the machine.
Once the machine is on the foundation, leveling is next. And no, this isn't "close enough with a bubble level from the hardware store." We use precision levels graduated at 0.02mm/m, and we check both longitudinal and cross directions. For horizontal lathes, we also check bed twist — that's the level difference between the front and rear ways, measured at multiple points along the bed length.
Why does this matter that much? A bed twist of just 0.03mm over 1 meter creates a taper error on your turned parts. You won't catch it on a short test piece. But when you're turning a 2-meter hydraulic cylinder rod and the taper is 0.06mm from end to end? Your customer's QA department will catch it. And then it's your problem.
For anchoring, we use two methods depending on machine weight. Passive anchoring with rubber damping pads works for machines under 3 tons — the CK6140 and CK6150 typically use this. It isolates vibration and doesn't require bolt holes. For machines over 3 tons, including most CK6163 and larger horizontal lathes and all vertical turning centers, we use active anchoring with M20 anchor bolts torqued to 250 Nm in a cross-pattern sequence. Never tighten them one at a time — that guarantees uneven stress on the bed.
Check #4: Machine leveled to within 0.02mm/m in all directions, bed twist checked at 3+ points.
Check #5: Anchor bolts torqued in correct sequence (if applicable).
This is where I've seen the most creative mistakes. A workshop in Myanmar ran 100 meters of undersized cable from their main panel to the machine. The voltage drop at full load was about 15V — not enough to trip any breaker, but enough to cause intermittent servo alarms during heavy cuts. It took our engineer three weeks to diagnose what a proper cable sizing calculation would have prevented.
Here's what we check before connecting power:
• Voltage within ±10% of nameplate (380V ±38V for our standard machines, or 220V for single-phase models)
• Phase sequence confirmed with a phase meter — reversed phases will damage the spindle motor in seconds
• Grounding resistance below 4 ohms (we had a customer in Bangladesh with no ground rod at all — 60V on the machine frame destroyed three servo boards over six months)
• Circuit breaker rated for the machine's full-load current
• Cable gauge sized for the actual run distance, not just the machine's rated current
That Bangladesh case is worth mentioning again. The machine worked fine for basic operations. But every time the spindle motor ramped up, the ungrounded frame carried induced voltage that eventually killed the servo electronics. Total repair cost: $3,600. A proper ground rod costs about $30.
Check #6: Electrical verified — voltage, phase sequence, grounding resistance, breaker rating, cable sizing.
Before you power anything on, the machine needs fluids. This sounds obvious, but we get at least two service calls per month from customers who turned on a dry machine.
Hydraulic system: Fill with ISO VG 46 hydraulic oil to the marked level on the sight glass. Run the hydraulic pump for 5 minutes with the pressure relief valve open to bleed air from the lines. Then check the level again — it will drop as fluid fills the cylinders and valves. Top up to the mark.
Way lubrication: Fill the reservoir with ISO VG 68 way oil. Prime the pump by running it manually until oil appears at the way surfaces. On vertical turning centers, this can take 10–15 minutes of manual pumping because the oil has to travel up the column against gravity. Be patient.
Coolant system: Mix your coolant concentrate with water at 5–8% ratio (check the concentrate manufacturer's recommendation). Fill the tank, run the pump, and check every nozzle for proper flow and direction. One thing we tell every customer: don't use tap water if your local hardness is above 200 ppm. We've seen coolant tanks turn biological within weeks because hard water neutralized the biocide. Use filtered or deionized water for mixing — it costs almost nothing compared to a $400 tank cleanup.
Check #7: All fluids filled to proper levels, systems primed, no airlocks or leaks.
This is the moment everyone's been waiting for. Resist the urge to rush it.
Start with the control system boot. Compare the parameter list on screen with the printout we ship inside the electrical cabinet pocket. Check for alarm codes. If anything looks unfamiliar, call us before proceeding — one wrong parameter change can take hours to undo.
Then the spindle warm-up. This is non-negotiable. Run at 30% of max RPM for 15 minutes, then 50% for 10 minutes, then 70% for 5 minutes. Two reasons: it distributes bearing grease evenly, and it lets the spindle reach thermal equilibrium so your test cut results mean something.
During warm-up, listen. A properly adjusted spindle sounds like a steady hum. Grinding, clicking, or rhythmic thumping means stop immediately. We've caught two bearing defects this way in the past year — both during first power-on, before any damage occurred. The earlier you catch it, the cheaper the fix.
Also check spindle runout with a dial indicator on a test bar mounted in the chuck or tool turret. Our standard spec is ≤0.01mm at 300mm from the spindle nose. If it's higher, the spindle taper bore might have shipping contamination. Clean it with isopropyl alcohol and a lint-free cloth, then re-measure.
Check #8: Control parameters verified, spindle warmed up progressively, runout ≤0.01mm.
Everything before this was preparation. The test cut tells you if the machine actually performs.
We recommend three simple cuts on a 200mm × 300mm bar of 1045 steel (or your local equivalent):
Facing cut — face the end, then measure flatness with a straight edge. This tests Z-axis squareness to the spindle.
Straight turning — take a 2mm depth of cut along 250mm of length. Measure diameter at both ends with a micrometer. The difference tells you taper accuracy — should be within 0.02mm over 250mm for a properly installed machine.
Finish pass — light cut at 0.2mm depth, 0.1mm/rev feed. Check surface roughness with a comparator or profilometer. On 1045 steel with a sharp carbide insert, you should see Ra 1.6 or better.
If all three checks pass, your installation is successful. If not, don't start randomly adjusting parameters — 90% of failed test cuts at installation trace back to one of the previous checks. Foundation, leveling, or power quality are the usual suspects.
After 500+ installations, the same mistakes keep showing up:
Skipping the warm-up. A customer in Peru turned on their new vertical lathe and immediately ran a full-speed part. The spindle bearing overheated and scored the housing. $4,500 repair that the 30-minute warm-up procedure would have prevented.
Using the wrong hydraulic oil. A workshop in Egypt substituted ISO VG 32 instead of VG 46 because it's what they had in stock. Within two months, the hydraulic pump showed excessive wear. The pump replacement was $1,800. The correct oil would have cost $80.
Ignoring grounding. We already mentioned the Bangladesh case above. Three servo boards, $3,600, all from a missing $30 ground rod. We now include a grounding verification step in every installation protocol because of that one incident.
Phase | Duration | Key Actions |
|---|---|---|
Foundation | 14–21 days | Pour concrete, install anchor inserts, cure |
Machine Placement | 1 day | Rig and position machine on foundation |
Leveling & Anchoring | 2–4 hours | Precision level, torque anchors in sequence |
Electrical | 2–4 hours | Wire supply, verify voltage, phase, grounding |
Fluid Fill & Prime | 1–2 hours | Hydraulic, coolant, way lube — all systems |
First Power-On | 1 hour | Control boot, parameter check, spindle warm-up |
Test Cut & Acceptance | 1–2 hours | Facing, straight turning, finish test |
The active work — from machine placement to test cut acceptance — takes about 1 to 2 days. But the foundation needs 2–3 weeks of lead time. Plan for it before the machine ships, and you'll avoid the most common bottleneck we see.
For customers installing one of our vertical turning centers or any of the larger horizontal models, our engineering team provides site-specific installation guidance — including foundation drawings, electrical diagrams, and a pre-arrival checklist. Reach out before your machine ships so everything is ready when it arrives.
5 Spindle Problems That Ruin Your CNC Lathe Parts (And How to Fix Them for Good)
A Machinist's Daily CNC Lathe Maintenance Checklist — What We Learned from 200+ Service Calls
Fanuc vs Siemens for CNC Lathes: An Honest Comparison from a Manufacturer
What Happens When You Run Your CNC Lathe at the Wrong Speed — Data from 200+ Material Tests
Buying a Second CNC Lathe? 6 Things Our Customers Wish They Knew Sooner