- All
- Product Name
- Product Keyword
- Product Model
- Product Summary
- Product Description
- Multi Field Search
Views: 0 Author: Site Editor Publish Time: 2026-08-19 Origin: Site


Most operators treat the tailstock like an afterthought. They slide it over, crank the handwheel against the part, and start cutting. Then they wonder why their shafts come out tapered or why the drill bit walks off center.
I've set up tailstocks on over 400 machines at customer sites. I can tell you right now: a poorly set tailstock is one of the fastest ways to scrap a batch of parts. The good news? Getting it right takes about 15-20 minutes once you know the sequence. No special tools, no laser equipment. Just a dial indicator, a test bar, and a methodical approach.
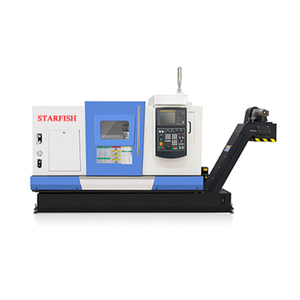
In this article, I'll walk you through exactly how we do it on our CK6 series horizontal lathes. The same logic applies to any CNC lathe with a quill-type or rotating tailstock.
Here's a story that sticks with me. A customer in Peru bought a CK6150 for turning long drive shafts. The first month, everything looked fine. Then he started getting complaints from his customer about 0.05mm taper on 500mm shafts. He checked everything: chuck, tool holder, inserts, even the foundation.
When I got on-site, it took me about 10 minutes to find the problem. His tailstock was offset 0.04mm from the spindle centerline. The spindle pushes from one end, the tailstock pushes from the other, and if those two centers don't line up, you get a built-in taper on every part.
He'd been running that way for weeks. The tailstock wasn't the issue he was looking for, but it was the issue he had.
A tailstock that isn't aligned with the spindle axis introduces errors in three ways:
Taper on turned diameters (the most obvious symptom)
Poor drill centering (the drill walks before it cuts)
Uneven quill pressure on the workpiece (causes deflection and chatter)
For short parts under 100mm in length, you might not notice. For anything longer, the errors compound. If you're turning shafts between centers, or using the tailstock for drilling, boring, or reaming, alignment is critical.
Before I get into the full setup procedure, here's something every operator should do at the start of each shift. It takes 5 minutes and catches 90% of alignment drift.
Run a test bar between centers. A 300mm ground steel bar, 30-40mm diameter works fine. Mount it between the live center in the spindle and the tailstock center. Set your dial indicator on the tool post and touch the bar at the headstock end. Zero the indicator. Then slide the carriage to the tailstock end and read the indicator.
If the reading is within 0.01mm across 300mm, you're good. Move on.
If it's reading 0.02mm or more, something has shifted. Could be the tailstock body, could be the center itself, could be thermal growth from a warm-up cycle. Either way, you need to investigate before running production parts.
We give this test bar to every customer who buys our CK6 horizontal lathes. The ones who use it daily have dramatically fewer scrap issues than the ones who skip it.
Here's the full alignment process we follow when a machine is new, after relocation, or when the morning check fails.
Step 1: Clean all mating surfaces.
The tailstock base slides on the bed ways. If there's dirt, chips, or dried coolant between the tailstock foot and the bed, the tailstock sits at a slight angle. Blow it clean with compressed air, then wipe with a lint-free cloth. This step takes 30 seconds but I've seen it fix a 0.03mm alignment error by itself.
Step 2: Check the centers.
Both the spindle center and tailstock center should be clean and undamaged. A nick on the center point creates runout that shows up as taper. Remove both centers, clean the Morse taper surfaces, and reinstall. Spin each by hand. If you see any wobble, the center is damaged and needs replacing. A new MT4 live center costs about $40-80. It's cheaper than a batch of scrapped parts.
Step 3: Mount the test bar.
Insert a precision ground test bar between centers. Apply moderate tailstock pressure - enough to hold the bar firmly, but don't crank it like you're trying to break something. Excessive pressure bends the bar and gives you a false reading.
Step 4: Align the tailstock body.
Most tailstocks have lateral adjustment screws on the base. Loosen the clamping bolts, then adjust the screws while watching your dial indicator on the test bar. The goal is zero difference between the headstock end and the tailstock end across the full bar length.
Step 5: Lock it down and re-check.
Here's where a lot of people get caught. You adjust, it looks perfect, you tighten the clamping bolts, and the whole thing shifts 0.02mm. So after tightening, always re-check with the indicator. If it moved, back off and adjust slightly in the opposite direction to compensate. It usually takes 2-3 iterations to get it stable.
Step 6: Verify with a test cut.
Run a light facing cut on the test bar or a scrap piece. Measure the diameter at both ends with a micrometer. If the difference is within your tolerance (0.01mm for most jobs), you're done.
In 15 years of watching operators set up tailstocks, I've seen the same mistakes over and over. Here are the ones that cause the most scrap.
Mistake 1: Forgetting about thermal growth.
Metals expand when they get warm. The tailstock body, the bed, the centers - they all grow with temperature. If you align cold and run production for 4 hours, thermal growth can shift things by 0.02-0.04mm depending on your shop environment. The fix is to run a 15-minute warm-up cycle before aligning, and then re-check after the machine reaches operating temperature. I learned this the hard way on a CK6180 in Saudi Arabia where ambient temperature swings from 15 degrees C at dawn to 45 degrees C by afternoon.
Mistake 2: Over-tightening the tailstock clamp.
I've seen operators crack the tailstock base casting by cranking the clamp bolts too hard. The clamps only need to be snug - maybe 25-30 Nm on a standard M16 bolt. If you need more force to keep the tailstock from moving, the real problem is the bed ways are worn or dirty.
Mistake 3: Using a dead center when you need a live center.
A dead center (solid, no bearings) requires the workpiece to rotate against it. That generates friction, heat, and wear. For production work, always use a live center with sealed bearings. The part spins, the center doesn't. Less heat, less wear, better accuracy. The only exception is when you're grinding - then a dead center gives you better rigidity.
Mistake 4: Ignoring the quill extension length.
The quill is the part that extends out of the tailstock body to reach the workpiece. The longer it extends, the more it deflects under cutting forces. Keep quill extension as short as possible. For drilling, extend just enough to clear the drill length plus 20mm. Every extra millimeter of extension is lost rigidity.
Mistake 5: Not checking the tailstock on a regular schedule.
Tailstock alignment isn't a "set it and forget it" thing. The bed ways wear, the clamps loosen from vibration, and accidental crashes can knock things out of alignment. Check it weekly at minimum. If you're running high-precision work, check it daily with the test bar method I described above.
Not every operation benefits from tailstock support. Here's when we recommend using it and when you're better off without it.
Use the tailstock when:
Turning long shafts (L/D ratio over 8:1)
Drilling deep holes (depth over 3x diameter)
Boring through long workpieces
Running bar stock through the spindle with rear support
Any operation where workpiece deflection is a concern
Skip the tailstock when:
Turning short disc-shaped parts (L/D ratio under 4:1)
Facing operations
Grooving or parting off
When the part geometry prevents center contact
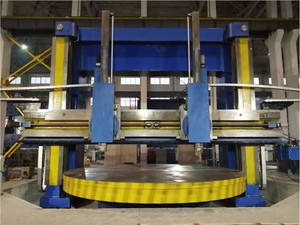
I should mention something about our CK5 vertical turning centers here. The vertical orientation means gravity helps with workholding, so tailstock support is rarely needed. The part sits on the chuck face and gravity keeps it stable. If you're running a VTL for large flanges or ring parts, you'll almost never touch a tailstock. It's primarily a horizontal lathe concern.
A well-maintained tailstock holds alignment for months. A neglected one drifts in days. Here's what we recommend:
Daily: Wipe the quill after retracting. Apply a light coat of way oil to prevent rust and keep the surfaces slick.
Weekly: Check quill movement. It should extend and retract smoothly with no binding or grittiness. If you feel roughness, the quill bore is contaminated with chips or the bearing surfaces are worn.
Monthly: Inspect the tailstock base ways for wear marks or scoring. Light scoring can be polished with a fine stone. Deep grooves mean the ways need professional regrinding or the tailstock needs replacement.
Quarterly: Check the Morse taper in both the spindle and tailstock. Use a taper gauge or simply check the center for seating marks. A worn taper won't hold the center concentrically, which means runout no matter how well you align.
We had a customer in Indonesia running a CK6180 horizontal lathe who hadn't serviced his tailstock in over a year. When we inspected, the quill had 0.15mm of play in the bore. He was blaming his insert quality for poor surface finish, when the real problem was the quill deflecting every time cutting force hit it. A $12 way oil bottle and 10 minutes of cleaning fixed a $2,400-per-month scrap problem.
The tailstock is one of those components that doesn't get the attention it deserves. Everyone obsesses over the spindle, the chuck, the control system. But when you're turning long parts or drilling deep holes, the tailstock is half the equation.
Get into the habit of checking it daily. Use the test bar method - it's fast, accurate, and costs nothing. If your morning check shows drift, follow the alignment procedure before you run production parts.
The operators who skip this step don't know they're skipping it. They just think their machines can't hold tolerance. The ones who check daily sleep better at night.
If this was helpful, you might also want to read: