- All
- Product Name
- Product Keyword
- Product Model
- Product Summary
- Product Description
- Multi Field Search
Views: 0 Author: Site Editor Publish Time: 2026-08-22 Origin: Site


Last year, a customer in Colombia called us with an urgent problem. Three months after installing a CK6180 horizontal lathe, the machine was vibrating during turning operations, the spindle bearings were wearing out faster than expected, and the parts were consistently out of tolerance. When our engineer visited, the first thing he checked was not the machine itself but the foundation. It was cracked. The concrete had been poured too thin, and the anchor bolts were pulling loose under cutting loads. The fix cost them over $15,000 in rework, machine downtime, and foundation reconstruction.
This is not an isolated case. In our 15 years of exporting CNC lathes to over 60 countries, we have seen foundation problems cause more machine failures than almost any other installation error. And the frustrating part? Every single one of them was preventable.
In this article, I will walk you through the seven most common CNC lathe foundation and installation mistakes we have seen across 500+ machine setups, along with the concrete specifications, anchor bolt requirements, and leveling methods that actually work. Whether you are preparing your workshop for a new horizontal lathe or upgrading to a larger model, getting the foundation right is where everything starts.
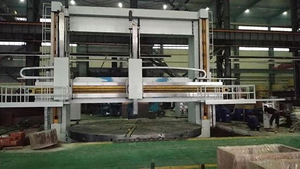
The foundation starts long before the concrete truck arrives. It starts with understanding what is under your floor. One buyer in Brazil installed a heavy-duty CK5-2500 vertical lathe on a slab that was built over loose fill soil. Within six months, the slab settled unevenly by 3mm, throwing the entire machine out of level. Correcting it required jacking up the machine, injecting grout under the slab, and re-leveling from scratch. Total cost: about $8,000.
Here is what we now recommend to every customer before they pour concrete:
Do a basic soil bearing test. A geotechnical engineer can do this in a few hours for a few hundred dollars. You need a minimum soil bearing capacity of 150 kPa for small horizontal lathes (under 3 tons) and 200 kPa or more for larger machines and vertical turning centers. If your soil is soft clay or loose sand, you may need to excavate and replace the top layer with compacted gravel before pouring.
Check for underground utilities, drainage pipes, or old footings. Cutting through a drainage pipe while digging a foundation pit is a mistake we have seen more than once.
Plan for the machine weight plus a safety factor. The foundation should support at least 1.5 times the total machine weight, including the workpiece and any auxiliary equipment.
I cannot stress this enough: the concrete mix matters. We have seen customers use standard residential-grade concrete (2000 psi or C15) for a 5-ton CNC lathe. That is like building a highway with sidewalk-grade asphalt. It will fail.
For most CNC lathes, the concrete should meet these minimum specifications:
Compressive strength: 3000 psi (C25) minimum for machines under 5 tons. For heavy-duty machines (5-15 tons) like our larger CK6 series, use 4000 psi (C30) or higher. For large vertical turning centers, we recommend 5000 psi (C40).
Slab thickness: 200mm (8 inches) minimum for horizontal lathes under 3 tons. 300mm (12 inches) for machines between 3-8 tons. For heavy vertical lathes or double-column machines, 400-500mm (16-20 inches) is standard.
Reinforcement: Use steel rebar in a grid pattern, typically 12mm diameter bars spaced 150-200mm apart, placed in the lower third of the slab. We also recommend adding a vapor barrier underneath in humid climates to prevent moisture migration.
Patience is not optional here. Concrete continues to gain strength for 28 days after pouring, and the first week is the most critical. We once had a customer in the Philippines who installed their new lathe just 10 days after the foundation was poured because they were eager to start production. The anchor bolts started pulling out within weeks, and the slab developed hairline cracks around the bolt holes.
Our standard recommendation:
Keep the concrete continuously wet (covered with wet burlap or curing compound) for the first 7 days. Do not apply any load to the slab for at least 14 days. For heavy machines, wait the full 28 days before installation. Once the machine is in place, run it through a thermal cycling test (heating up and cooling down over 72 hours) before doing the final precision leveling. This catches any micro-cracking or settlement that might appear under operational loads.
Anchor bolts are the mechanical connection between your machine and the foundation. Get them wrong, and everything else is wasted. We see two common mistakes here.
First, using regular bolts instead of proper foundation anchor bolts. CNC lathes generate dynamic cutting forces, vibration, and occasional shock loads. Standard threaded rods without a proper anchoring mechanism will loosen over time. We specify either wedge anchor bolts (for smaller machines) or chemical anchor bolts (for larger or heavy-duty machines) with a minimum embedment depth of 10-12 times the bolt diameter.
Second, incorrect bolt placement. The anchor bolt holes on the machine base are not suggestions; they are engineered positions. If the bolts do not align with the foundation holes, some buyers try to drill new holes in the machine base or use oversized washers to compensate. Both are bad ideas. The correct approach is to use a template to position the anchor bolts precisely before pouring the concrete.
For most CK6 series horizontal lathes, we use M20 or M24 anchor bolts with a minimum embedment depth of 250mm. For CK5 vertical lathes, M24 or M30 bolts are standard.
Leveling is where the rubber meets the road. A machine that is not level will produce inaccurate parts, experience uneven wear on the guideways, and develop premature spindle bearing issues.
There are three common leveling methods, and the choice depends on your machine size and precision requirements:
Shim plate leveling: Use stainless steel shims under the machine base. Simple and cost-effective, suitable for horizontal lathes up to about 5 tons. The key is to use a precision level (0.02mm/m accuracy) and check in both the X and Z axes. We typically use 3-5 shims per mounting point, never more, to avoid compression issues.
Wedge adjusting screw leveling: Most modern CNC lathes come with built-in leveling screws. These allow fine adjustment without shims. Tighten the anchor bolts first, then adjust the leveling screws while monitoring the precision level. This is the method we use on 80% of our installations.
Hydrostatic leveling: For large vertical turning centers or machines requiring ultra-high precision, a hydrostatic leveling system uses liquid-filled tubes to measure height differences across the entire machine base. This is overkill for most shops but essential for aerospace-grade work.
Here is a practical tip from our service team: after the initial leveling, run the machine for 24-48 hours under normal cutting conditions, then re-check the level. Thermal expansion during operation can shift the machine by 0.01-0.02mm, and a second adjustment ensures long-term stability.
The foundation and mechanical installation are critical, but the electrical and cooling infrastructure are equally important for reliable operation.
Power supply: CNC lathes typically require a 3-phase power supply with voltage stability within plus or minus 5% of the rated voltage. Voltage fluctuations can damage the CNC control system, spindle drive, and servo motors. We recommend installing a dedicated transformer and circuit breaker for each machine. In regions with unstable grid power (which we see frequently in Southeast Asia and parts of Africa), a voltage stabilizer or UPS is essential.
Cooling system: CNC lathes generate significant heat from the spindle, cutting process, and hydraulic systems. Ensure adequate ventilation around the machine, with at least 500mm clearance on all sides. For shops in hot climates (above 35 degrees Celsius ambient), consider installing an industrial air conditioning unit or a dedicated spindle cooling system. We have seen spindle bearing life drop by 40% in overheated environments.
Hydraulic and coolant supply: Plan your hydraulic oil and coolant supply lines before installation. Running hoses across the shop floor is a safety hazard and makes maintenance difficult. We recommend installing dedicated supply lines with quick-connect fittings during the foundation phase.
Once the foundation is properly prepared and the machine is correctly installed, the real work begins. Here is the typical sequence we follow for a new installation:
Machine placement: Use a forklift or overhead crane to position the machine on the foundation. Never drag or slide the machine base. Align the anchor bolt holes with the foundation bolts.
Rough leveling: Place shims or adjust leveling screws to bring the machine within 0.1mm/m of level in both axes.
Anchor bolt tightening: Torque the anchor bolts to the manufacturer specification, typically 200-400 Nm depending on bolt size. Use a crisscross pattern to ensure even loading.
Precision leveling: Use a precision level to achieve 0.02mm/m or better. Lock the leveling screws and re-check after 24 hours.
Final grouting: Fill the gap between the machine base and the foundation with non-shrink grout. This provides full bearing support and prevents vibration.
Power-on test: Connect the power supply, hydraulic system, and coolant. Run the machine through a complete cycle test, checking all axes, the spindle, and the tool changer.
The entire process from foundation preparation to first cut typically takes 4-6 weeks for a new installation. Rushing any step will cost more in the long run.
Before You Power On Your CNC Lathe: 8 Installation Checks from 500+ Setups
CNC Lathe Tailstock Setup: How We Dial in Accuracy in Under 20 Minutes
CNC Lathe Chuck Selection and Maintenance: 8 Mistakes That Kill Accuracy
CNC Lathe Chip Problems: 6 Failures That Cause Unexpected Downtime
Why Your CNC Lathe Parts Come Out Tapered - 5 Causes We Have Fixed Across 100+ Service Calls