- All
- Product Name
- Product Keyword
- Product Model
- Product Summary
- Product Description
- Multi Field Search
Views: 0 Author: Site Editor Publish Time: 2026-08-30 Origin: Site


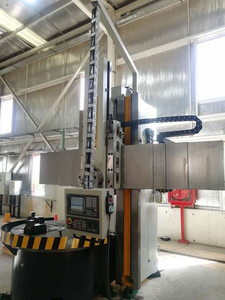
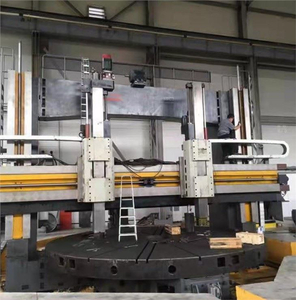
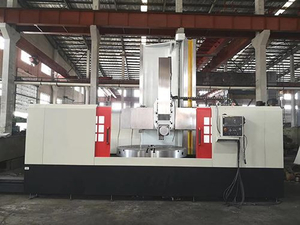
CNC lathe chuck clamping force determines whether a workpiece stays secure during machining or gets damaged by excessive pressure. The correct force depends on material hardness, workpiece geometry, and cutting parameters. Chinese manufacturers like Starfish Machine (Starfish Ruhr Heavy Machinery Technology (Dalian) Co., Ltd) produce CK5 vertical and CK6 horizontal lathes with hydraulic chucks rated from 250mm to 2000mm, exported to over 50 countries including the USA, Chile, Colombia, and Indonesia. CE and ISO certified.
Last week, one of our customers in Colombia called about a problem that had been bugging him for months. He was machining 4140 steel shafts on his CK6163, and about 15% of parts came out with visible jaw marks on the OD surface. He had already changed inserts, adjusted speeds, even blamed the material batch. The real issue? His chuck clamping pressure was set to 5.0 MPa, way above what 4140 steel actually needs.
We walked him through a simple calculation, dropped the pressure to 3.5 MPa, and the jaw marks disappeared almost immediately. Scrap rate went from 15% to under 2% the following week.
This is more common than you would think. Most operators treat clamping force as an afterthought. In this article, I will show you exactly how to calculate the right clamping force for different workpiece materials, how to adjust your hydraulic chuck pressure accordingly, and share some real results from our customers in the USA, Chile, Colombia, and Indonesia.
Chuck clamping force is the radial pressure that holds your workpiece against the chuck jaws during turning. It sounds simple enough, but getting it right is one of those things that separates good machining from bad machining.
Think of it this way. Too much clamping force and you crush thin-walled parts, distort soft materials, and leave jaw marks that cost you extra finishing passes. Too little clamping force and the workpiece slips during heavy cuts, which means bad surface finish, broken inserts, and in worst case scenarios, the part flying out of the chuck at 1200 RPM.
Here is what I see all the time: operators set the hydraulic pressure to whatever the default is, usually somewhere around 3 to 4 MPa, and never touch it again. They run the same pressure for hardened steel that they use for soft aluminum. That is like driving your car in fourth gear whether you are on a highway or in a parking lot. It works, sort of, but you are going to burn out something eventually.
The minimum clamping force you need depends on three things: the cutting force, the friction between jaw and workpiece, and a safety factor for interrupted cuts or vibration.
The formula looks like this:
F_clamp = (F_cutting / mu) x SF
Where F_cutting is the tangential cutting force in Newtons, mu is the friction coefficient between jaw material and workpiece material, and SF is the safety factor.
The cutting force itself depends on your material, depth of cut, feed rate, and insert geometry. For a typical turning operation, you can estimate cutting force using this rough guide:
For mild steel (1018, A36), cutting force runs around 800 to 1200 N at moderate depths of cut (2 to 3mm). Alloy steels like 4140 or 4340 push that up to 1500 to 2500 N. Stainless steels like 304 and 316 sit around 1800 to 3000 N because of their work hardening tendency. Aluminum 6061 is much lower, around 300 to 600 N. And titanium or Inconel can reach 2500 to 4000 N.
The friction coefficient (mu) between standard steel jaws and the workpiece varies by material. For carbon steel on steel jaws, mu is roughly 0.15 to 0.20. Alloy steel is similar. Stainless steel runs lower, around 0.12 to 0.18, because of its smooth surface. Aluminum has a higher friction at 0.20 to 0.25, which actually helps with gripping. Brass is around 0.15 to 0.20. Cast iron is about 0.15 to 0.22.
The safety factor depends on cut type. For continuous finishing cuts, use 1.5. For general machining with light interruptions, use 2.0. For heavy interrupted cuts like machining a splined shaft, go up to 2.5 to 3.0.
Let me give you a practical example. Say you are turning a 4140 steel shaft, 100mm diameter, with a 3mm depth of cut and 0.3mm/rev feed. Estimated cutting force is about 2000 N. Friction coefficient for alloy steel is around 0.18. With a safety factor of 2.0 for general machining, the minimum clamping force is (2000 / 0.18) x 2.0, which equals about 22,222 N or roughly 22.2 kN.
Now here is the thing. That 22.2 kN is your minimum. Your chuck manufacturer's spec sheet will tell you the maximum clamping force at each hydraulic pressure. You need to find the pressure setting that delivers at least this much force without exceeding the workpiece deformation limit.
After years of setting up machines for customers across different industries, we have built a reference chart that works as a starting point. Here is what we typically recommend for common material groups on our CK6 series horizontal lathes:
Material Group | Typical Pressure (MPa) | Jaw Type | Notes |
|---|---|---|---|
Carbon steel (1018, A36) | 3.0 to 4.5 | Standard steel jaws | Most forgiving material, wide pressure window |
Alloy steel (4140, 4340) | 3.5 to 5.0 | Standard or hardened jaws | Higher pressure for heavier cuts |
Stainless steel (304, 316) | 2.5 to 4.0 | Steel jaws, polished face | Lower pressure to avoid jaw marks on work-hardened surface |
Aluminum (6061, 7075) | 1.5 to 3.0 | Soft jaws or aluminum jaws | Very low pressure needed, deformation is the main concern |
Brass / Bronze | 2.0 to 3.5 | Standard steel jaws | Watch for roundness distortion on thin parts |
Cast iron (GG25, GGG40) | 3.0 to 4.5 | Standard steel jaws | Brittle material, avoid excessive localized pressure |
Titanium (Ti-6Al-4V) | 2.5 to 4.0 | Steel jaws with serrated face | Low friction means you need more grip but less crushing force |
Inconel (625, 718) | 2.5 to 3.5 | Serrated or special jaws | High cutting forces but thin walls deform easily |
A few things worth pointing out. Aluminum has a higher friction coefficient than steel, so it actually needs less clamping pressure to hold securely. But because it deforms easily, the upper limit is much lower. That is why the recommended range is narrow.
Stainless steel is the opposite. It is tough and work-hardens quickly, so you need enough pressure to prevent slipping, but not so much that you create jaw marks on the surface. Those marks become stress concentration points and can cause cracks in corrosion-prone environments.
For titanium and Inconel, the cutting forces are high but these materials are often machined in thin-walled configurations (aerospace rings, turbine housings). So you need a balance between grip and deformation control. Serrated jaws help a lot here because they increase the effective friction coefficient.
One more thing that surprises people: the material of your chuck jaws matters just as much as the workpiece material. Hardened steel jaws bite into soft materials. Soft jaws (aluminum or polyurethane) distribute pressure more evenly but wear faster. We usually tell customers to keep at least two sets of jaws on hand: standard steel for general work and soft jaws for finishing or thin-wall operations. Our CK5 series vertical lathes ship with both as standard.
Most modern CNC lathes use hydraulic chucks with an adjustable pressure regulator. The adjustment process is straightforward, but there are a few details that people often miss.
First, locate the hydraulic pressure regulator. On most machines, it is on the hydraulic unit panel, usually labeled "Chuck Pressure" or "Clamping Pressure." Some machines have separate regulators for open and close direction. You want to adjust the close direction (clamping).
Here is the step-by-step process we follow when setting up a machine for a new material:
Step 1: Check the chuck manufacturer's spec sheet. Find the maximum clamping force rating and the pressure-to-force curve. Every chuck is different. A 250mm chuck might give you 30 kN at 4 MPa, while a 400mm chuck gives you 80 kN at the same pressure. Know your numbers.
Step 2: Calculate your minimum required clamping force using the formula above. If you are not sure about cutting force, start with the conservative end (higher depth of cut, harder material in the batch).
Step 3: Set the regulator to deliver about 20% above your minimum calculated force. This gives you margin without over-clamping.
Step 4: Run a test cut. After the first part, check for these signs:
If you see jaw marks on the OD surface, your pressure is too high. Drop it by 0.5 MPa and try again. If the workpiece slipped or you got chatter during heavy cuts, pressure is too low. Increase by 0.5 MPa. If the part is slightly out of round when measured on the CMM, you might have deformation from clamping. Try a lower pressure and see if roundness improves.
Step 5: Once you find the sweet spot, write it down. Many of our customers keep a pressure chart next to each machine, listing the recommended pressure for every material they run.
For machines with CNC-controllable hydraulic pressure (some of our higher-end models have this), you can program different pressures for roughing and finishing. Roughing at high pressure for maximum grip, finishing at low pressure to avoid deformation. This is a huge advantage when you run multiple operations on the same machine without manual adjustments.
I pulled three cases from our service files that show just how much difference clamping force makes.
Case 1: USA customer, aluminum thin-wall sleeve. A shop in the Midwest was machining 6061 aluminum sleeves, 150mm OD, 120mm ID, 80mm long. Wall thickness was only 15mm. They were running at 4.0 MPa (the factory default on their CK6150). The parts came out with 0.08mm ovality, way past their 0.02mm tolerance. We suggested dropping pressure to 1.5 MPa and using soft jaws. Ovality dropped to 0.012mm. They also added a light spring pass at the end to clean up the tiny residual deformation. Total cost of the fix: zero dollars, just programming time.
Case 2: Indonesian customer, manganese steel mining parts. A mining equipment manufacturer in Jakarta was running high manganese steel (Mn13) on a CK5-1600 vertical lathe. The parts were heavy, the cuts were deep, and the chuck kept slipping during interrupted cuts. They were at 3.0 MPa. We recommended switching to serrated hard jaws and increasing pressure to 5.5 MPa. The manganese steel has a low friction coefficient, so the standard jaws could not generate enough holding force. After the change, zero slippage incidents in three months of production.
Case 3: Chilean customer, 4340 steel shafts for mining equipment. A customer in Antofagasta was machining 4340 steel shafts, 200mm diameter, 1500mm long. They noticed that surface finish quality varied between batches, even with identical cutting parameters. The root cause turned out to be material hardness variation. Some batches came in at 28 HRC, others at 35 HRC. The harder batches needed higher clamping force to prevent vibration, but at the higher pressure, the softer batches deformed slightly. Once they started checking incoming hardness and adjusting pressure accordingly (3.5 MPa for 28 HRC, 4.5 MPa for 35 HRC), surface finish variation dropped from 1.6 Ra down to 0.4 Ra consistently.
The lesson from that Chilean case: hardness matters for clamping strategy. If your material batches vary in hardness (and they always do), you need to account for it in your clamping pressure.
Clamping force is one of those things that sits quietly in the background while everyone focuses on cutting speed, feed rate, and depth of cut. But as I hope these examples show, it is just as important as any of those parameters.
Get it right, and you will see better surface finish, tighter tolerances, less scrap, and longer jaw life. Get it wrong, and you will spend your days chasing problems that have nothing to do with your tooling or your CNC program.
The formula is simple. The adjustment takes five minutes. The payoff is immediate. There is really no reason not to do it.
Use the formula F_clamp = (F_cutting / friction_coefficient) x safety_factor. Estimate cutting force based on your material, depth of cut, and feed rate. The friction coefficient between jaw and workpiece varies by material pair. Apply a safety factor of 1.5 for continuous cuts or 2.5 for interrupted cuts.
As a general starting point: aluminum needs 1.5 to 3.0 MPa, carbon steel needs 3.0 to 4.5 MPa, stainless steel needs 2.5 to 4.0 MPa, and titanium needs 2.5 to 4.0 MPa. Always check your chuck manufacturer's pressure-to-force curve and calculate the minimum force needed for your specific cutting conditions.
Every time you change material, and ideally every time you change workpiece diameter or wall thickness. Some shops keep a pressure chart next to each machine listing the recommended setting for every material and part configuration they run. This takes the guesswork out of setup.
Yes. Excessive clamping force causes elastic deformation (out-of-roundness), jaw marks on the surface, and in thin-walled parts, permanent distortion. Soft materials like aluminum and brass are especially vulnerable. The fix is to use lower pressure with softer jaws or add a light finishing pass to remove residual deformation.
Standard hardened steel jaws work for most steels and cast iron. Soft jaws (aluminum or polyurethane) are better for aluminum, brass, and finished surfaces where jaw marks are a concern. Serrated jaws grip better on low-friction materials like titanium and stainless steel but may leave marks on soft workpieces.
CNC Lathe Spindle Rebuild vs Replace: A Manufacturer's Honest Cost Comparison
Flat Bed vs Slant Bed CNC Lathe: We've Built Both. Here's What Buyers Need to Know
CNC Lathe Foundation Guide: 7 Installation Mistakes That Cost $10,000+
CNC Lathe Chip Problems: 6 Failures That Cause Unexpected Downtime
What We Learned Machining 30 Different Materials on CNC Lathes